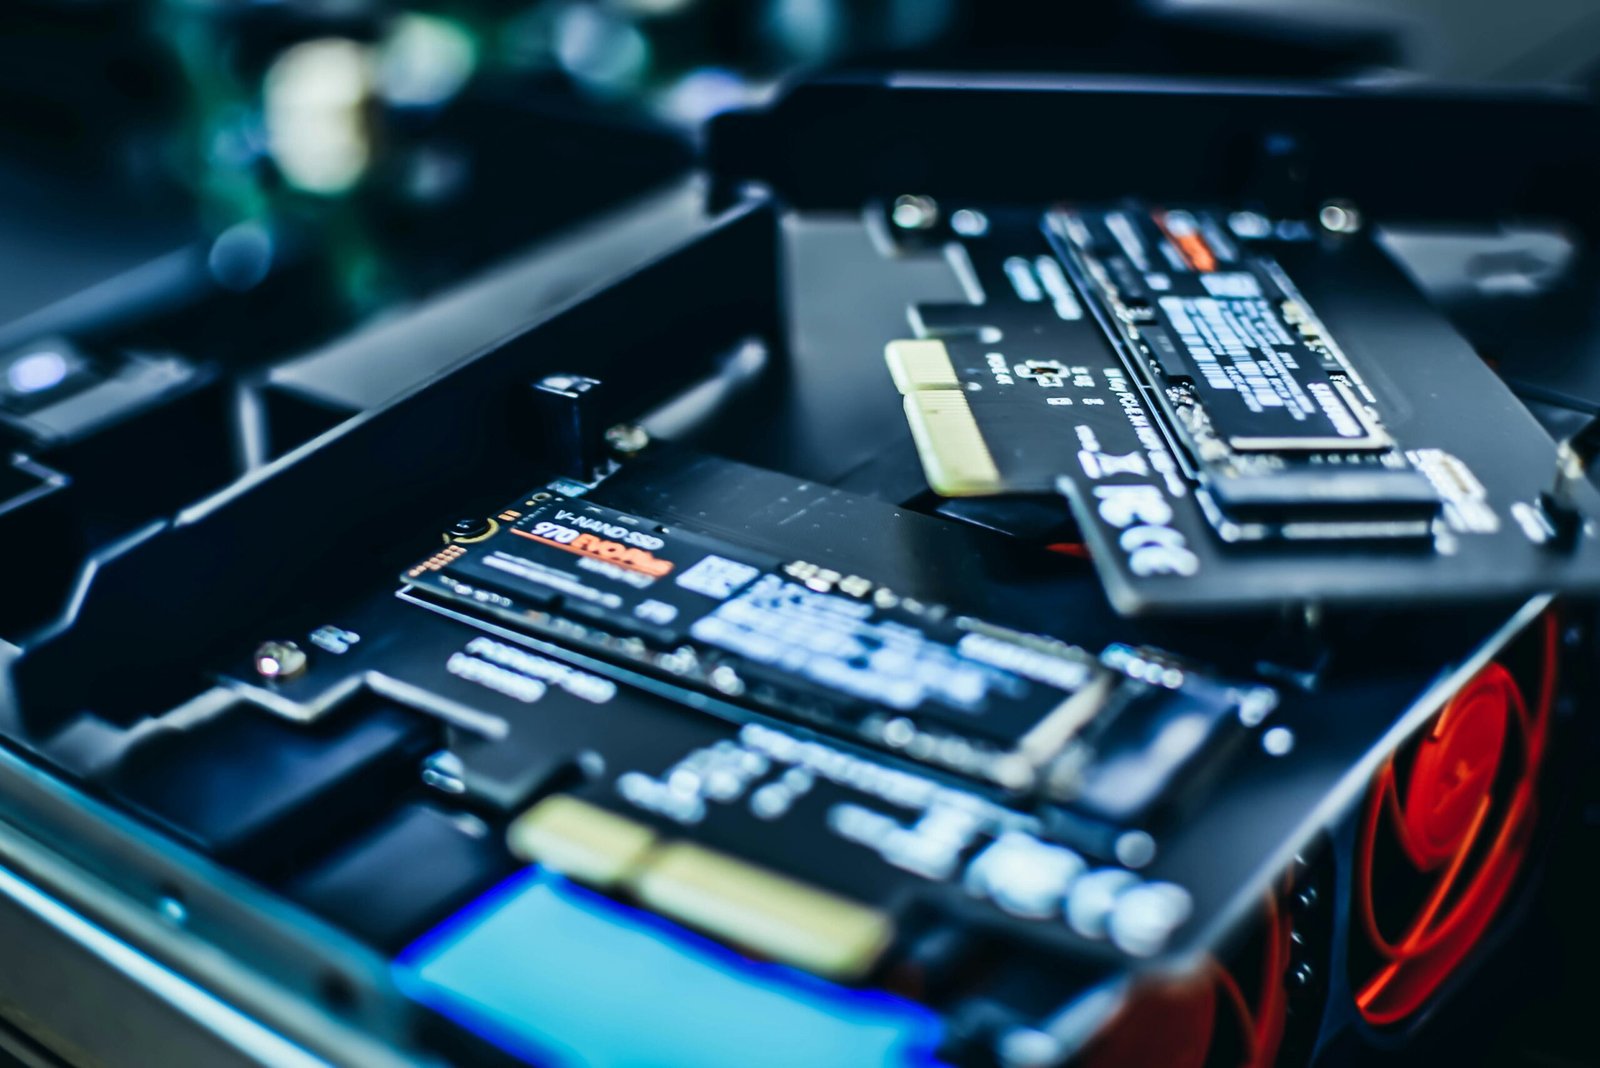
black and gray computer motherboard

Top 10 Best SSD Hard Drives

Introduction

Welcome to our list of the top 10 best SSD hard drives! If you’re in the market for a new solid-state drive (SSD) to boost your computer’s performance, you’ve come to the right place. In this article, we’ll be highlighting some of the most reliable and high-performing SSDs available on the market today.

1. Samsung 970 Evo Plus

The Samsung 970 Evo Plus is a top-of-the-line SSD that offers lightning-fast speeds and impressive storage capacity. With read and write speeds of up to 3,500 MB/s and 3,300 MB/s respectively, this SSD is perfect for gamers and professionals who require high-performance storage.

2. Western Digital Black SN750

The Western Digital Black SN750 is another excellent choice for those seeking a high-performance SSD. With read and write speeds of up to 3,470 MB/s and 3,000 MB/s respectively, this SSD delivers exceptional performance for gaming and intensive workloads.

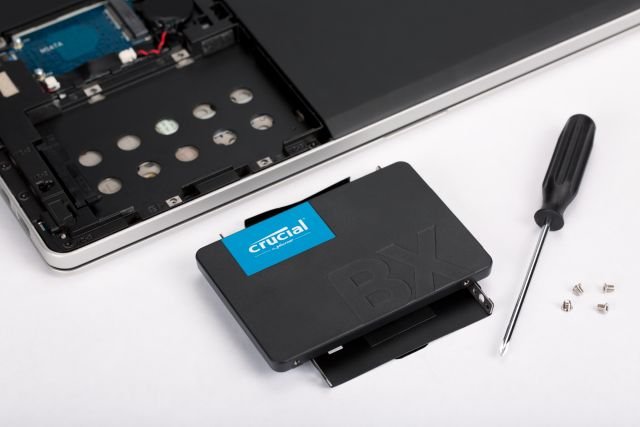
3. Crucial MX500

The Crucial MX500 is a reliable and affordable SSD that offers great value for money. With read and write speeds of up to 560 MB/s and 510 MB/s respectively, this SSD provides a significant improvement over traditional hard drives at an affordable price point.

4. Kingston A2000

The Kingston A2000 is a budget-friendly SSD that doesn’t compromise on performance. With read and write speeds of up to 2,200 MB/s and 2,000 MB/s respectively, this SSD offers great value for money and is perfect for everyday computing tasks.

5. SanDisk Extreme Pro

The SanDisk Extreme Pro is a high-end SSD that delivers exceptional performance and durability. With read and write speeds of up to 3,400 MB/s and 2,800 MB/s respectively, this SSD is ideal for professionals who require fast and reliable storage.

6. Intel Optane 905P

The Intel Optane 905P is a premium SSD that offers lightning-fast speeds and impressive endurance. With read and write speeds of up to 2,600 MB/s and 2,200 MB/s respectively, this SSD is perfect for power users and professionals who demand the best performance.

7. Seagate FireCuda 520

The Seagate FireCuda 520 is a high-performance SSD that offers excellent speed and reliability. With read and write speeds of up to 5,000 MB/s and 4,400 MB/s respectively, this SSD is perfect for gamers and content creators who require fast and responsive storage.

8. Toshiba XG5

The Toshiba XG5 is a reliable and affordable SSD that offers good performance for everyday computing tasks. With read and write speeds of up to 3,000 MB/s and 2,100 MB/s respectively, this SSD provides a noticeable improvement over traditional hard drives.

9. Adata XPG SX8200 Pro

The Adata XPG SX8200 Pro is a high-performance SSD that offers great value for money. With read and write speeds of up to 3,500 MB/s and 3,000 MB/s respectively, this SSD is perfect for gamers and professionals who require fast and reliable storage.

10. HP EX950

The HP EX950 is a budget-friendly SSD that delivers impressive performance. With read and write speeds of up to 3,500 MB/s and 2,900 MB/s respectively, this SSD offers great value for money and is perfect for everyday computing tasks.

Conclusion

Whether you’re a gamer, professional, or casual computer user, upgrading to an SSD can greatly improve your computer’s performance. The top 10 SSDs listed above offer a range of options to suit different needs and budgets. Consider your specific requirements and choose the SSD that best meets your needs. Happy computing!

black and gray computer motherboard

Are you tired of waiting for your computer to boot up or your applications to load? Upgrading your computer or laptop to a solid-state drive (SSD) hard drive can significantly improve its performance and speed. In this blog post, we will explore the benefits of upgrading to an SSD and why it is worth considering.

1. Faster Boot-Up and Application Loading Times

One of the most noticeable benefits of upgrading to an SSD is the lightning-fast boot-up time. Unlike traditional hard drives that rely on spinning disks, SSDs use flash memory to store and access data. This means that your computer can start up in a matter of seconds, allowing you to get to work or play without any delays.

Additionally, applications installed on an SSD load much quicker compared to traditional hard drives. Whether you’re launching a web browser, editing photos, or playing a game, you’ll experience reduced waiting times and a more seamless computing experience.

2. Improved Overall Performance

Upgrading to an SSD can have a significant impact on the overall performance of your computer or laptop. With faster data transfer speeds, tasks such as file transfers, copying large files, and accessing documents become much quicker. This means you can be more productive and spend less time waiting for your computer to catch up.

SSDs are also more reliable and durable than traditional hard drives. Since SSDs have no moving parts, they are less prone to mechanical failure and data loss. This makes them a more reliable choice, especially if you travel frequently or use your laptop on the go.

3. Energy Efficiency and Longer Battery Life

SSDs are not only faster but also more energy-efficient compared to traditional hard drives. Since they don’t have spinning disks, SSDs consume less power, resulting in longer battery life for laptops. This means you can work or enjoy your favorite media for extended periods without having to worry about finding an outlet.

4. Noiseless Operation

Traditional hard drives generate noise due to the spinning disks and moving parts. Upgrading to an SSD eliminates this noise, providing you with a quieter computing experience. Whether you’re working in a quiet office environment or enjoying a movie at home, the absence of a humming hard drive can make a noticeable difference.

5. Easy Installation and Compatibility

Upgrading to an SSD is relatively straightforward, and most modern computers and laptops support SSDs. Depending on your device, you can either replace your existing hard drive with an SSD or add an SSD as a secondary drive. Many SSDs also come with migration software that simplifies the process of transferring your data from your old hard drive to the new SSD.

However, it’s important to note that SSDs have a limited lifespan in terms of the number of write cycles they can endure. While this is not typically a concern for regular usage, it’s worth considering if you frequently write large amounts of data or perform heavy tasks that involve constant writing to the SSD.

Conclusion

Upgrading your computer or laptop to an SSD hard drive can provide a significant boost in performance, speed, and overall user experience. With faster boot-up times, improved application loading, increased reliability, energy efficiency, and noiseless operation, an SSD is a worthwhile investment for anyone looking to enhance their computing capabilities.

So, if you’re tired of waiting for your computer to catch up or simply want to take advantage of the latest technology, consider upgrading to an SSD hard drive and enjoy the benefits it brings to your computing life.

ssd hard drive

Upgrade Your Hard Drive to an SSD

Computer or Laptop Running slow ?

Upgrade Your Hard Drive to an SSD

Solid State Drives, also know as SSDs have become increasingly popular in recent years due to their high performance and reliability compared to traditional Hard Disk Drives SATA (HDDs). If you are still using an SATA HDD, upgrading to an SSD can significantly improve your computer’s performance and speed. In this article, we will explore the top reasons to upgrade to an SSD hard drive.

Faster boot and load times: One of the most noticeable benefits of an SSD is the significant reduction in boot and load times. With an SSD, your computer can start up in just a few seconds, and applications can launch almost instantly. This is because SSDs have no moving parts and can access data faster than an HDD.

Improved overall system performance: SSDs can improve overall system performance, such as faster file transfers, quicker app launches, and smoother multitasking. An SSD can reduce the time it takes to save and open files, which is especially helpful when working with large files or when working on projects with multiple files open at once.

Longer lifespan and reliability: SSDs have a longer lifespan compared to traditional HDDs because they have no moving parts that can wear out or break. This makes them more reliable and less prone to physical damage. Additionally, SSDs are less susceptible to mechanical failure, making them a better choice for laptops that are frequently moved or dropped.

Lower power consumption: SSDs consume less power than traditional HDDs, which can lead to longer battery life on laptops and lower electricity bills for desktop users. This is because SSDs do not require as much power to operate their non-moving parts as HDDs need for their spinning disks.

Quieter operation: As SSDs have no moving parts, they operate much more quietly than HDDs. This can be especially noticeable in laptops where the noise from an HDD can be distracting or annoying.

More storage space: SSDs are available in larger sizes than ever before, making it easier to store large files, applications, and multimedia content. This is especially helpful for users who require a lot of storage space for video editing, graphic design, or gaming.

In conclusion, upgrading to an SSD hard drive can significantly improve your computer’s performance and reliability. With faster boot and load times, improved overall system performance, longer lifespan and reliability, lower power consumption, quieter operation, and more storage space, it is clear that SSDs are the future of data storage. Whether you are a casual user or a power user, upgrading to an SSD is a worthwhile investment that will enhance your computing experience.

Upgrade Your Hard Drive to an SSD, the benefits speak for themselves

Call today on 07564432851

Asus ROG Strix X99 Review

Gamer’s Edge

The Asus ROG STRIX X99 is part of a series of motherboards from Asus that is running the effective Broadwell-E HEDT CPUs. These motherboards include a number of features to both enthusiast and overclockers.

ASUS ROG STRIX X99 DESIGN AND FEATURES

Asus ROG Strix X99 motherboards include RGB Lighting, cooling management, and enlargement slots. It has a whole series of colours to pick from in addition to configurable lighting fixtures consequences. To enhance expansion slots, ASUS makes makes use of of a singular technology termed SS or Safe Slot that uses a metal body for each PCI-e enlargement slot for you to upload greater electricity to every slot and prevent them from ability harm. The new motherboards will provide a ton of functions to overclockers and fans who may be going for walks Broadwell-E HEDT CPUs.

In truth, the modern day Broadwell-E processors from Intel can feature with the prevailing present X99 motherboards, by means of an effective firmware replace. The X99 includes numerous superior capabilities that support the modern-day garage, I/O, as well as connectivity abilities. It may also feature the latest LGA 2011-v3 socket to support Broadwell-E processors. These features make the ROG STRIX X99 Gaming motherboard extraordinarily powerful.

ASUS ROG STRIX X99 BROADWELL-E MOTHERBOARDS

Some new functions at the motherboards consist of RGB Lighting, expansion slots reinforcement and cooling management. RGB Lighting is becoming an increasing number of not unusual on motherboards, and ASUS is avidly pursuing this trend on all their modern products. The motherboards will feature several colors to pick out from, and lighting effects to configure at the boards.

The ROG STRIX X99 Gaming boasts of the essentially monochrome subject matter that the employer began the use of because these days and appears actual extremely good. This particular motherboard comes with a black and orange coloration scheme, so one can impart to the entirety an attractive copper contact. The X99 additionally capabilities RGB lightning in order that customers are able to remodel colors over its I/O panel in addition to internal heatsink with good sized ease.

CONNECTIVITY

The Asus ROG Strip X99 is prepared with an eight 8 Phase Digit III VRM this is effectively powered by an 8 plus four Pin electricity connector. The board comes without a less than 8 DDR4 DIMM slots which can run reminiscence with extremely high speeds of a maximum 3333 MHz. The growth slots have four PCI-e three.Zero x16, 2 PCI-e 3.Zero x1 slots as additionally a unmarried M.2 slot down at the lowest of the PCH heat sink. To add a touch of colour, the PCI-e enlargement slots boasts of small LEDs which may be configured through the usage of RGB results. As to storage options, there are 10 SATA III, one U.2 port, one SATA Express and 1 U.2 ports.

Then there are Ethernet, Wi-Fi Bluetooth four.0 connectivity, USB three.0, USB 3.1ports, 2 internal USB 3.0 connectors, and plenty of fan ports too, for effective adjustment of fan speed depending on their positions.

VERDICT

With all its powerful functions along with Broadwell-E HEDT CPUs, game enthusiasts could have an interesting time with the Asus ROG Strix X99.

By MellowD / Tips and Advice / 0 Comments

Except for one LED (Light Emitting Diode) laptop screen I am typing on proper now I’ve never had a LCD (Liquid Crystal Display) laptop display ultimate over five years. The LED video display units are generally 15″ and really costly for their length inside the range of $500 to $900. My 15″ rectangular LED reveal price $four hundred around 10 years in the past however is still going sturdy. My 25″ extensive display screen LCD monitor simply went black on me after three years so I’m confronted with selecting between another LCD with better photo quality or an LED that is lots more dependable.

I’ve seen LED monitors in larger sizes however a great LED screen in a bigger size is very luxurious. You can get off brand LED video display units for lots less however they use cheap electronic additives so their reliability would not be that superb. All the LCD monitors and monitors I’ve owned in the beyond before the flat panel LCDs have most effective lasted three to 5 years then “Poof” they pass black.

Flat panel T.V. Units use the same era as pc monitors as far as “Backlit Displays” and “Pixelation”. Some T.V. Sets at the moment are set up as pc video display units and T.V. Sets because the era is so similar. LED TVs and laptop video display units use some distance less energy and besides for the life like photo first-rate they’re far advanced than the LCDs in the whole lot however life like picture nice.

The picture first-class on LCD video display units is very advanced and can’t be equaled through the LED video display units right now. LED pc video display units are on the upward push now with new era bobbing up that is making the picture high-quality of the LED monitors that of the LCD. This new LED technology is just starting to appear in T.V. Units. T.V. Units use the identical backlit era as pc monitors, but my trouble has always been with laptop video display units maximum possibly due to the fact laptop video display units are synthetic at as better rate than T.V. Units because of call for of computers over T.V..

The distinction among the LED and LCD is the back lighting. The LED uses “Light Emitting Diodes” that light up pixel regions which could closing for all time and the LCD makes use of fluorescent Cold-cathode lights that lighting fixtures up every individual pixel. Backlighting character pixels gives greater shiny shades and real existence pictures however makes use of a fluorescent Cold-cathode backlighting that is going horrific and not worth the price of repairing. Purchasing a new pc reveal is more cost effective. The LEDs and the “Light Emitting Diodes” can ultimate forever and your laptop screen may additionally die from different digital issue failure earlier than the “Light Emitting Diodes” fail.

The LED will come up with extra rich hues, however the LCD will give you a more life like photograph. More people are flocking to the LCD due to the image high-quality which lowers the fee of them, but LED shows are on the come again with better photograph high-quality.

Plasmas are lifeless. I examine that simplest LG is making plasmas now. LEDs and LCDs are greater dependable. Plasmas run hotter for the reason that complete screen is basically just a massive fluorescent Cold-cathode lamp even as with LCDs the display is made up of liquid crystals with simply multiple small fluorescent Cold-cathode lamps behind. So since the LCD runs cooler, it has a longer life and the LEDs hardly ever use any electricity at all with little or no warmness.

Most possibly I am swayed to go with any other LED show and just pay the higher cost if I can discover a name brand that manufactures a few 25″ LEDs with exceptional electronic additives. I like my little 15″ rectangular show monitor however with the wide displays I can open up 4 net websites and get a huge sufficient show on all 4 to meet me. Right now with the awful economic system and the dumping of older LED technology for the incoming new LED era you can get video display units being phased out for LCD reveal fees. I see most of the newer era LED monitors manner up above the $400 charge variety.

By MellowD / Tips and Advice / 0 Comments

Computer printers are all round us these days. They are located in many houses, all through the majority of groups, and they are able to even be accessed in libraries and other public buildings. They offer a handy and fairly cheaper approach of publishing a wide kind of files, starting from simple textual content files to complete color reviews or even pictures.

While a printer can be picked up for little extra than £30 and cartridges are to be had at under £10 each, for a few models, this hasn’t constantly been the case. When printers had been first introduced, they were prohibitively high priced for home customers, and simplest the most superior and nicely-off corporations ought to absolutely manage to pay for to put money into a printer.

Dot Matrix

Early client printers had been primarily based on daisy wheel designs, which had been very much like the running mechanism of a typewriter. However, those had been slow, and line printers have been introduced as a more updated and faster printing opportunity. Dot matrix printers ought to print a aggregate of both textual content and pix, but the finished pleasant changed into low.

The LaserJet

HP launched the LaserJet laser printer in 1984. It become to be had for a charge kind of equivalent to £2,000 which could be considered expensive via modern day requirements but was considered a first-rate breakthrough on the time. Apple launched the Laser Writer a year later, and this competition saw costs start to drop and nice begin to growth. Inkjet printers were changing the now obsolete daisywheel and dot matrix printers and, by means of 1990, suitable quality computer printers have been available for underneath £one hundred. By ultra-modern standards the fine was negative, however leaflets, flyers, and similar paper based totally designs have been being created on computer computers and printed at home for fantastically little outlay.

3-D Printing

3-d printing may be taken into consideration the next evolution in printing, even though strictly talking it’s miles a way of additive production and now not printing. It is likewise nevertheless considered pretty expert and, despite the fact that domestic 3-D printers are available, the enterprise has but to sincerely blossom.

Today’s Printers

In state-of-the-art printer market, the two maximum generally used variations are monochrome laser printers and coloration inkjet printers:

    • Laser Printers – Monochrome laser printers produce high satisfactory text and portraits by using passing a laser over a negatively charged drum. The drum collects electrically charged ink, referred to as toner, and transfers it to the paper, which is then heated in order to create a lasting illustration. These gadgets, which have been once taken into consideration cutting part and carried a fittingly excessive charge tag, are not handiest low-cost however are readily available and are usually observed in houses and places of work across the world.
  • Inkjet Printers – Epson, HP, and Canon were the frontrunners in developing inkjet printers within the 1970s, and these three manufacturers, in conjunction with Brother, are chargeable for the manufacturing and manufacturing of the bulk of this sort of printer to these days. Droplets of ink are propelled onto paper or other types of printing media with print quality various in line with the cost and nice of the printer itself. Inexpensive models are to be had that offer reasonable printing at low expenses, whilst greater high-priced fashions can produce high pleasant and attractive prints however not best do the printers themselves price extra, but so too does every revealed web page.

As nicely as upgrades inside the best of the printers themselves, the marketplace has also skilled improved printer ink pleasant and decreased fee on printing consumables. Buying ink and toner is simple, brief, and handy, and it manner that purchasers and agencies can experience non-stop printing answers, some thing their specific requirements.

By MellowD / Tips and Advice / 0 Comments

How To Buy A Printer

Printing generation has advanced loads in recent times. There are numerous modern and time-saving functions to be had in present day printers. Whether you are trying to update an vintage printer with a brand new one or are searching to buy your first printer, here are a few things which want due attention:

Requirement – There are distinct kinds of printers to fit extraordinary needs and makes use of. Make a listing of your necessities to determine which one will paintings the excellent for you.The one you buy will depend mainly for your need and the place of use. Home customers typically do not use print that frequently. They especially print faculty undertaking papers or snap shots for any artwork challenge. They do not want a printer with too many functions or one which fees an excessive amount of. In office, there are quite a few files to be revealed on a ordinary foundation and workplace customers commonly look for professional high-quality output. Professional photographers want a committed image printer with advanced functions which allows them the ease to print images anyplace they want.

Type – People particularly purchase both a laser or an ink jet printer. Laser printers print faster and price less in line with page to print. Their print excellent is excellent however photo nice is terrible in comparison to an inkjet printer. If you’ve got a lot of pages to print every day, consider buying a laser printer.

Space – Laser printers are huge and occupy extra space. If you have confined space in your own home or workplace, buy an inkjet printer.

Features – Modern printers come with loads of functions like Wi-Fi, cell printing, paper handling, duplexing, contact display screen display, media card slots and USB ports and built-in memory card reader. You should buy a regular printer in case you are not seeking out too many superior functions.

Ink and Toner – If you need to print documents with phrases best, get a black and white printer. If you print files with shade photographs, buy a shade printer. An inkjet printer uses ink and laser printer use toner cartridges. Take into consideration the cost of ink and toner cartridges whilst buying a printer.

Always buy a printer from an authorized provider. If you’re shopping for on line, ensure which you get driving force updates. Read on line approximately the one-of-a-kind sorts of printers available, their capabilities and contemporary printing techniques to make an knowledgeable choice.

By MellowD / Tips and Advice / 0 Comments

If you depend upon your PC to get most of your work carried out, then you definately recognize how irritating even the slightest laptop troubles can be. One of the pleasant ways of making sure that your computer overall performance is efficient and dependable is with the aid of as a minimum studying to clear up not unusual problems. There are a number of Windows PC troubles which can without problems be solved getting you returned into fun performance and that they encompass the subsequent:

Slow computer – It is one of the most typical problems among Windows users. Before thinking about changing your PC take into account the reasons in the back of the slowdown. Some of the reasons in the back of it include corrupted registry, pointless applications, adware and fragmented statistics. You can without difficulty get your speeds lower back by means of eliminating programs you by no means use or shutting them down while you are achieved the usage of them. You can also get Windows packages to smooth registry and run disk defragmenter.

Computer freezes – Viruses are generally at the back of this trouble. Malware infections are at the rise, main to the freezes. Computer hardware can also lead to the trouble. Be careful while clicking links you aren’t acquainted with or suspicious looking links to save you viruses. Install anti-adware and antivirus and ensure it’s miles usually up to date. It is likewise helpful to test hardware drivers for up to date variations and uninstalling components lately installed if you suspect the hassle is hardware associated.

Unexpected flip offs – If you preserve experiencing surprising laptop, flip offs, you could have horrific cable connections, insufficient electricity supply or defective battery. When your PC overheats, it is also probable to close down so it is able to cool. Beat the hassle through ensuring cables are connected well and checking the fan frequently so you can dust and clean as appropriate. If you’re the usage of a pc, you may want to test the battery; deterioration over the years is inevitable and it is able to be time to have it changed.

Web printing fails – You may be faced with a want to print documents from the internet handiest to discover that your laptop may not print. It could be because the report you are trying to print is password protected consequently making it now not printable or it is able to be that you have grew to become on pop-up blocker. It would be an awesome idea to allow transient pop-u.S.A.And you could also discover legitimate programs to interrupt codes in documents that are blanketed.

Strange noises – They may be vibration or buzzes. They generally are due to failed or failing hardware. Electrical thing issues may also purpose whining noises while loss of ventilation can motive the buzzing noises. Consider cleansing the fan and filter out off any dust and make certain the air inlets are unfastened. In some instances, you could want to uninstall and reinstall sound drivers or replace sound card.

Problems getting on line – Network misconfigurations, software and hardware router errors, wrong IP cope with, service issuer latency and firewall application can all be chargeable for this. Check all factors that remember, including your community connection repute so you can reboot the router wherein essential or call your ISP.

Today, we’re going to delete disk partitions in Windows 10 that appear to be undetectable. These partitions can sometimes be labeled as recovery partitions or OEM partitions, but they all have one thing in common: they’re protected, making them impossible to delete from certain tools in Windows. The symptom is apparent when you look at a disk in the Disk Management utility of Windows. To start the utility, simply right-click the Windows button and choose Disk Management. Let me slide this over so I can show you in this corner of the desktop.

We have two disks, labeled 0 and 1. The partitions I want to delete are on disk 0, which shows five partitions. If I right-click on any one of these, you can see what options are available in the context-sensitive menu. On this first partition, Delete Volume is obviously greyed out. In fact, as I right-click on the subsequent ones, the option to delete doesn’t even show up. The second, third, and fourth partitions have only one selection. The fifth one actually does give me the ability to delete it, so I’ll go ahead and do that. Note that this isn’t my current Windows boot partition, which is on disk 1. This is actually an old Windows disk that I want to erase, so I can use it as a secondary storage disk. It will complain that it’s already in use, but I can go ahead and delete it because it’s just a copy of Windows. In a previously published video, I showed you how to clone a hard drive containing Windows to a bootable SSD drive.

I’m simply deleting the partitions from the hard drive so I can use it as secondary storage. That gives us four remaining partitions which are undetectable from Disk Management. The solution is to use a built-in command line utility in Windows called diskpart. Let’s go to our search bar and type “cmd,” which return the command prompt. I’ll right-click on it and run it as administrator. Let me move this up a little bit so we can see what happens graphically in the Disk Management screen. The first thing to do is execute diskpart, spelled d-i-s-k-p-a-r-t. It’s a command line disk partition utility and by typing “list disk” and then Enter, it gives us a list of all the physical drives in the computer. You can see disks 0 and 1 correspond to the same 0 and 1 in Disk Management. We now need to select the disk that has the partitions that we want to delete. Since the command line doesn’t have a graphical interface, we need to type “select disk 0” to select it. When I “list disk” again, you’ll see a star next to disks 0, indicating that it is selected, and that we’re ready to perform an operation on it.

Now, let’s list the partitions on this disk by typing “list partition.” You can see we have five partitions listed, even though Disk Management shows only four. Partition 2 is the one that’s missing, which means that not only is it undeletable, but it’s also hidden in Disk Management. It’s a small reserved partition that’s created by Windows, but I’d like to delete that also. Again, just like we selected a disk, we need to select a partition. If we list the partitions again, you’ll see the selection with a star. There is a shortcut for the word “partition.” I can type “list part,” and that’s the same as “list partition,” so from this point forward, I’ll use “part” instead of “partition.” Now that partition 1 is selected, we need to delete it. I’ll simply type “delete part” and press Enter. But because it’s a protected partition, the delete fails.

What we’ll need to do is type “delete part” and then add the argument “override,” and hit enter – and that does indeed delete the partition. We can confirm that in Disk Management, where the first partition is now allocated. Let’s list the partitions again, and notice that partition 1 is now gone. Let’s select parts 2, and try deleting that with “delete part.” Again, it fails because it’s protected, so I need to type “delete part override.” Now it’s just a matter of selecting and deleting the remaining partitions with the override flag. Let’s “select parts 3” and “delete part override.” Select the fourth one and delete it. And finally, “select parts 5” and delete the partition. Now when I list my partitions, they’re all gone. If we go to Disk Management, you’ll notice that it’s not responding, because it doesn’t like the fact that we’re trying to delete something from another process. So I’ll need to kill off the application, force close it, and then restart Disk Management. You can see that disk 0 is now clear of all partitions, with an unallocated space of the total hard drive.

At this point, I’m able to create my own volumes and partitions, and format them as I normally would.

Hello, everybody! I am going to show you how to restore data from a computer that will not start, how to create your own bootable USB drive with a set of utilities for data recovery with Windows PE, how to boot a computer with such a USB drive and how to restore data. If you suddenly encounter failures in the work of your operating system and it can’t boot anymore but there are still some important files left on its hard disk – don’t give way to despair – you can try to restore them even if they have been deleted. Using our method, not only you will be able to boot a full-fledged Windows without installing it, but also use various software to check your HDD, search and remove viruses, create new partitions, recover data and so on.

Restoring with AOMEI PE Builder+ Hetman Partition Recovery For starters, you should download a free program called AOMEI PE Builder and a portable version of Hetman Partition Recovery, copy them to a USB drive or disk, boot from there, scan the disks and restore the necessary data. So download AOMEI PE Builder from the official website and the portable version of

– all the links will be in the description. Install AOMEI PE Builder, and then unpack the folder containing Hetman Partition Recovery from the archive. Run AOMEI PE Builder, click Next, check the box next to Create 32-bit version of Windows PE and click Next again. Choose the versions depending on what kind of software you are going to use – 32-bit or 64-bit. In the next window, you can choose what software will be written to this USB drive; if you don’t need any extra programs, uncheck all boxes or open each of the sections and choose the ones you will really need for further work. In order to add your own utilities, click Add Files, then Add Folder and specify the path to the folder containing the program.

It should be a portable version, otherwise it just won’t start, and the bitness of the program should be the same as the system bitness you have chosen. Check the folder with the necessary program and click OK, then click Next again, choose what kind of media you want to use – a USB drive, a disk or a hard disk of the computer. I choose a USB drive, click Next – now there’s a window with a warning that this device will be formatted and all data erased, so click Yes if you agree; it starts the process of creating a bootable USB drive with Windows PE and a set of chosen utilities.

It requires Internet access and the process can take some time, depending on the set of programs and the speed of your Internet connection. When it’s over, you’ll see the Finish button; as soon as you click it, the bootable USB drive with Windows PE is ready to use. Now all you have to do is to connect it to the computer which fails to boot, and turn it on. Insert it into a USB port of the computer and set the PC to boot from the USB drive. You can watch a detailed guide on how to do it in another video on our channel How to Enter BIOS or UEFI and Boot Your PC From a USB Drive (find the link in the description): The system will boot automatically, and you’ll see an interface very similar to Windows 10, and the list of programs you have selected before.

Here, you can open This PC and try to find your data in one of the disks you can see; by the way, the disk letters may not be the same they used to be when your computer was still OK. If you have found your data, just connect another disk or removable media and copy your files there. If a folder containing your information is gone, try restoring it. To do it, run Hetman Partition Recovery, which you can find in the folder User program and scan the disk where your files used to be; for convenience, you can change the language settings. Click on the menu item View, Language and choose the one you need.

Now select the necessary folder and click to recover, and specify the path to the disk where you want to put the recovered files. That’s all – your data is back. Now you see that a bootable disk or USB drive will come in very handy in a situation, when the operating system fails in a computer with important data and reinstallation can result in losing precious information. Windows PE without a shell If you are good enough at using command prompt, you can create a USB drive with Windows PE and try to restore the system with the good old command prompt. To do it, you’ll have to download an ADK software package; I will give the link in the description and install it, checking the boxes for Deployment Tools and Windows Preinstallation Environment (Windows PE) at the beginning.

After installation, type Deployment and Imaging Tools Environment in the Start menu and run it as administrator. In the window that opens, run the command to create a folder containing files of a Windows PE distribution kit for x86 or amd64 version: For x86: copy x86 C:\WinPE_x86 For amd64: copy amd64 C:\WinPE_amd64 Now, you can create an ISO file: For x86: MakeWinPEMedia /ISO C:\WinPE_x86 C:\WinPE_x86\WinPE_x86.iso For amd64: MakeWinPEMedia /ISO C:\WinPE_amd64 C:\WinPE_amd64\WinPE_amd64.iso After that, connect the USB to the computer and run it from the USB drive; the system will boot and you will see a window with the command prompt.

To add your own programs to the Windows PE package before creating the image, type the following command: image /mount C:\WinPE_amd64\media\sources\boot.wim 1 C:\WinPE_to\mount Then copy the programs you need to the folder mount and run the following command: image /unmount /commit C:\WinPE_to\mount After that, run the command to create the ISO image, and then write the image to a disk or USB drive.

https://www.aomeitech.com/pe-builder.html

https://hetmanrecovery.com/hard_drive_recovery/software.htm